Anka Build Cloud on Linux
Welcome! This tutorial guides you through setting up your Anka Build Cloud on Linux using Docker and Docker-Compose.
Necessary Hardware
- A machine running Linux to install the Anka Controller & Registry.
- A Mac to install Anka CLI as a Node.
While it's possible to run Docker on mac, it's not recommended. An Anka Controller & Registry package exists.
Necessary Software
- Docker
- Docker-Compose – Be sure to follow the Post Installation setup in order to run docker-compose without using sudo.
What we are doing in this tutorial
- Install the Anka CLI + Create your first VM Template
- Install the Anka Build Cloud Controller & Registry
- Link the Anka CLI Node to the Controller
- Start a VM instance using the Controller UI
Step 1: Get familiar with the Anka CLI
Install the Anka CLI
Perform the following steps on the machines you intend to be Nodes. “Nodes” are the host machines you want to run the Anka VMs. You can use any Apple hardware for this.
You can find the various Anka Build packages on the Anka Build download page. You can use the guided installer by launching the .pkg, or install from your terminal.
Download the latest Anka PKG
curl -L -o Anka.pkg https://veertu.com/downloads/ankabuild-latest
Install the Anka PKG
sudo installer -pkg Anka.pkg -tgt /
Or, if you need nested virtualization to run Docker inside of the VM:
You can find Nested Virtualization inside of the Custom Install section of the guided installer. You can get there using the
Customizebutton on the Installation Type stage.
We currently only support Docker within Nested Virtualization
sudo installer -applyChoiceChangesXML nanka.xml -pkg Ankaxx.pkg -target /
You'll need modify your Anka VM Template and Tags with
anka modify name set nested 1
Verify the installation
anka version
- The output should be similar to
Anka Build Basic version 2.1.2 (build 112).
Activate your Anka license
sudo anka license activate <key>
For Anka CLI commands and options, see the Command Reference.
Create your first VM Template
Obtain the macOS installer
There are multiple ways to obtain the installer .app file for Mac OSX that we'll detail for you below:
If you have a pending upgrade to the next minor or patch version of Mac OS:
- Within
Preferences -> Software Update -> Advanced, make sureDownload new updates when availableis checked butInstall macOS updatesis not. While you're still withinSoftware Update, clickUpdate Nowbut do not install the next version (Restart) until after you've created the Anka VM or the Install .app under /Applications will be deleted. - Or on Catalina from the terminal, run
sudo softwareupdate --fetch-full-installer --full-installer-version 10.15.4to download the installer. - You can also use the App Store to download the installer.
- Within
On any Mac OS version you can use the installinstallmacos.py script (requires python):
Download and run the script:
curl --fail --silent -L -O https://raw.githubusercontent.com/munki/macadmin-scripts/master/installinstallmacos.py
sudo chmod +x installinstallmacos.py
sudo ./installinstallmacos.py --raw
The script downloads an image to the location of the .py script, so further steps are necessary to create an Anka VM:
mkdir -p /tmp/app
hdiutil attach "<installinstallmacos.py image path>" -mountpoint /tmp/app
cp -r "/tmp/app/Applications/Install Mac OS Mojave.app" /Applications/
hdiutil detach /tmp/app -force
rm -f "<installinstallmacos.py image path>"
Have your local IT department provide a network volume or download links.
Generate the Template
sudo anka create --app /Applications/Install\ macOS\ Catalina.app/ 10.15.4
We recommend adding a version to the Template name so it's clear what version of OSX it is.
The VM creation should take around 30 minutes.
You can find detailed instructions for
anka createhere.
You can continue on to Step 2 while you wait for this to finish.
Step 2: Install the Anka Build Cloud Controller & Registry
Perform the following steps on the machine intended to run the Controller & Registry.
Download and extract the Controller & Registry
mkdir -p ~/anka-docker-controller-registry
cd ~/anka-docker-controller-registry
curl -L -o anka-docker-controller-registry.tar.gz https://veertu.com/downloads/ankacontroller-registry-docker-latest
tar -xzvf anka-docker-controller-registry.tar.gz
You can also manually download the file called “Cloud Controller & Registry (Run on Linux Instance)” from the Anka Build Download page.
Configuration
We'll need to do two things:
- Set the external registry address – This address is passed to the Nodes so they can pull VM Templates from the Registry.
- Mount a volume for the Registry data – The directory containing VM disk images and configuration files.
First, edit the docker-compose.yml.
Under
anka-controller > environment, find the variable ANKA_REGISTRY_ADDR.Next to it, replace ***EDIT_ME*** with the URL of your Registry:
      . . .

      anka-controller:
        build:
          context: .
          dockerfile: anka-controller.docker
        ports:
          - "80:80"
        # To change the port, change the above line: - "CUSTOM_PORT:80"
        ######   EDIT HERE FOR TLS  ########
        # volumes:
          # Path to ssl certificates directory
          # - ****EDIT_ME****:/mnt/cert
        depends_on:
          - etcd
          #  - beanstalk
          - anka-registry
        restart: always
        environment:

          # Address of anka registry. this address will be passed to your build nodes
          ANKA_REGISTRY_ADDR: ****EDIT_ME****

          # Local Anka registry address
          # This address is used by the Controller.

      . . .
It should look like:
ANKA_REGISTRY_ADDR: http://<ip>:8089Under
anka-registry > volumes, find the line that says # - ****EDIT_ME****:/mnt/vol.First, uncomment this line by removing the # sign from the head of the line. Then replace ****EDIT_ME**** with the path on your machine where you want the Registry files to be saved:
      . . .

      anka-registry:
      build:
          context: .
          dockerfile: anka-registry.docker
      ports:
          - "8089:8089"
      # To change the port change the above line: - "CUSTOM_PORT:8089"
      restart: always
      volumes:
          ######   EDIT HERE  ########
          # Path to registry data folder.
          # VM data files and logs will be saved in this folder
          # - ****EDIT_ME****:/mnt/vol

          # Path to ssl certificates directory
          # - ****EDIT_ME****:/mnt/cert

      . . .
It should look like:
- /var/anka:/mnt/vol
If you're running these containers on mac, you need to also change etcd's local volume destination from
/var/etcd-datato a writable location on your mac.
Start the containers
Ensure you're in the same directory as the
docker-compose.yml.
docker-compose up -d
This command builds your containers and runs the services defined as a daemon.
To stop the docker containers, run:
docker-compose down
Verify the containers are running
docker ps

CONTAINER ID        IMAGE                 COMMAND                  CREATED              STATUS              PORTS                    NAMES
aa1de7c150e7        test_anka-controller   "/bin/bash -c 'anka-…"   About a minute ago   Up About a minute   0.0.0.0:80->80/tcp       test_anka-controller_1
0ac3a6f8b0a1        test_anka-registry     "/bin/bash -c 'anka-…"   About a minute ago   Up About a minute   0.0.0.0:8089->8089/tcp   test_anka-registry_1
03787d28d3a3        test_etcd              "/usr/bin/etcd --dat…"   About a minute ago   Up About a minute                            test_etcd_1
Anka Controller should be listening on port 80 (HTTP). Try pointing your browser to the machine's IP or hostname. You can use localhost or 127.0.0.1 if you're on the Controller machine.
Your new dashboard should look like the picture below
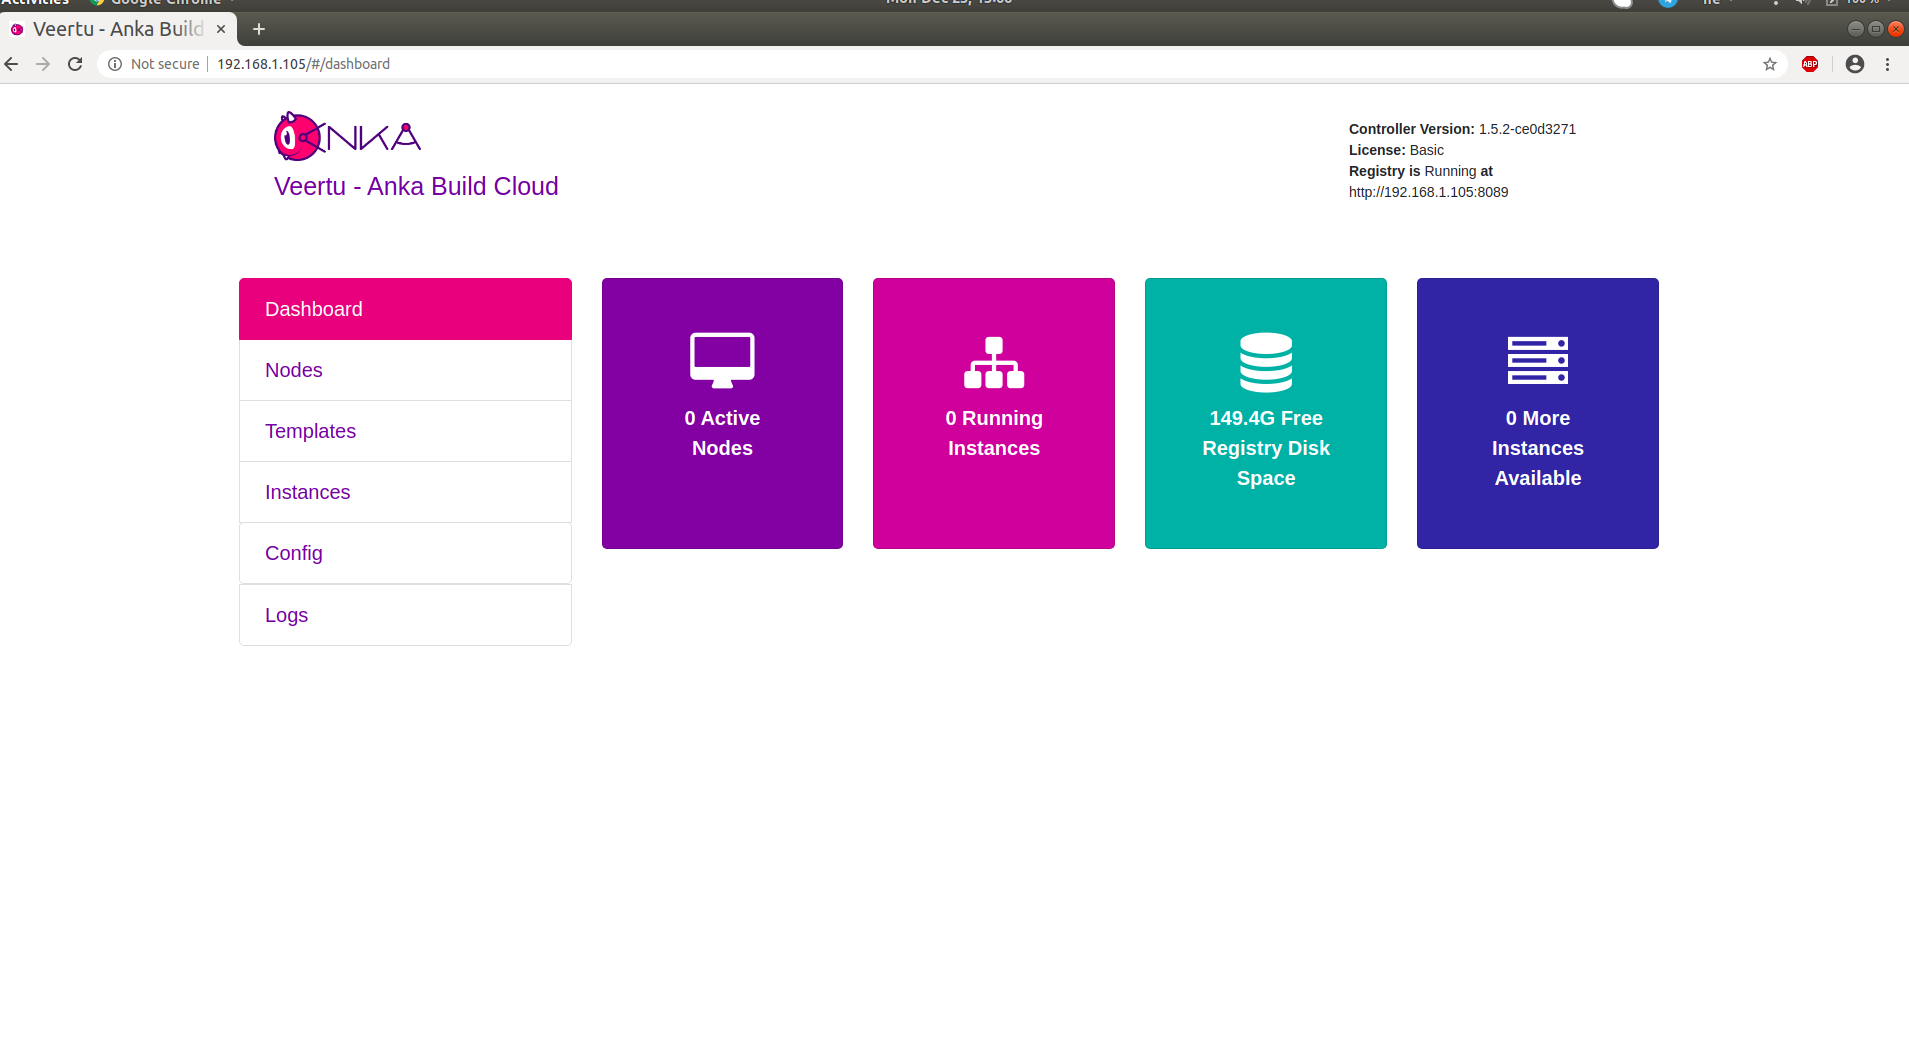
Orientation
Let's take a look at what is now running on your machine:
- Anka Controller is serving web UI and REST API on port 80.
- Anka Registry is serving REST API on port 8089.
- ETCD database server serving on ports 2379 and 2380 (used by Anka Controller).
Configuration and scripts
Make configurations by editing docker-compose.yml. Most of the stuff you can configure is listed there but commented out.
Check out the variables under the environment section of each service. A full reference is available.
Logging
Containers are writing logs to stderr, making them available to Docker.
To see the Controller's logs:
docker logs --tail 100 -f test_anka-controller_1
To see the Registry's logs:
docker logs --tail 100 -f test_anka-registry_1
The log level can be modified from the default 0 value. The higher the number, the more verbose the logging. (reference)
Step 3: Link the Anka CLI Node to the Controller
Great! Now that we have our Anka Controller & Registry up and running, let's add Nodes!
Perform the following steps on the Node where you created your first VM Template.
Add the Registry
We now need to configure the Registry on this machine so we can push/upload the local VM Template we created earlier. Uploading the Template to the Registry makes it possible to download and run it from other nodes.
Assuming you haven't changed the default port configuration, your Registry is serving requests on port 8089.
sudo anka registry add <registry name here> http://<ip>:8089
Verify the configuration:
sudo anka registry list-repos
++
++

<registry name you set> (default)

+--------+------------------+
| host   | <the ip you set> |
+--------+------------------+
| scheme | http             |
+--------+------------------+
| port   | 8089             |
+--------+------------------+
Then, confirm the registry list command doesn't throw any failures:
sudo anka registry list
Push the VM to the Registry
sudo anka registry push catalina -t base
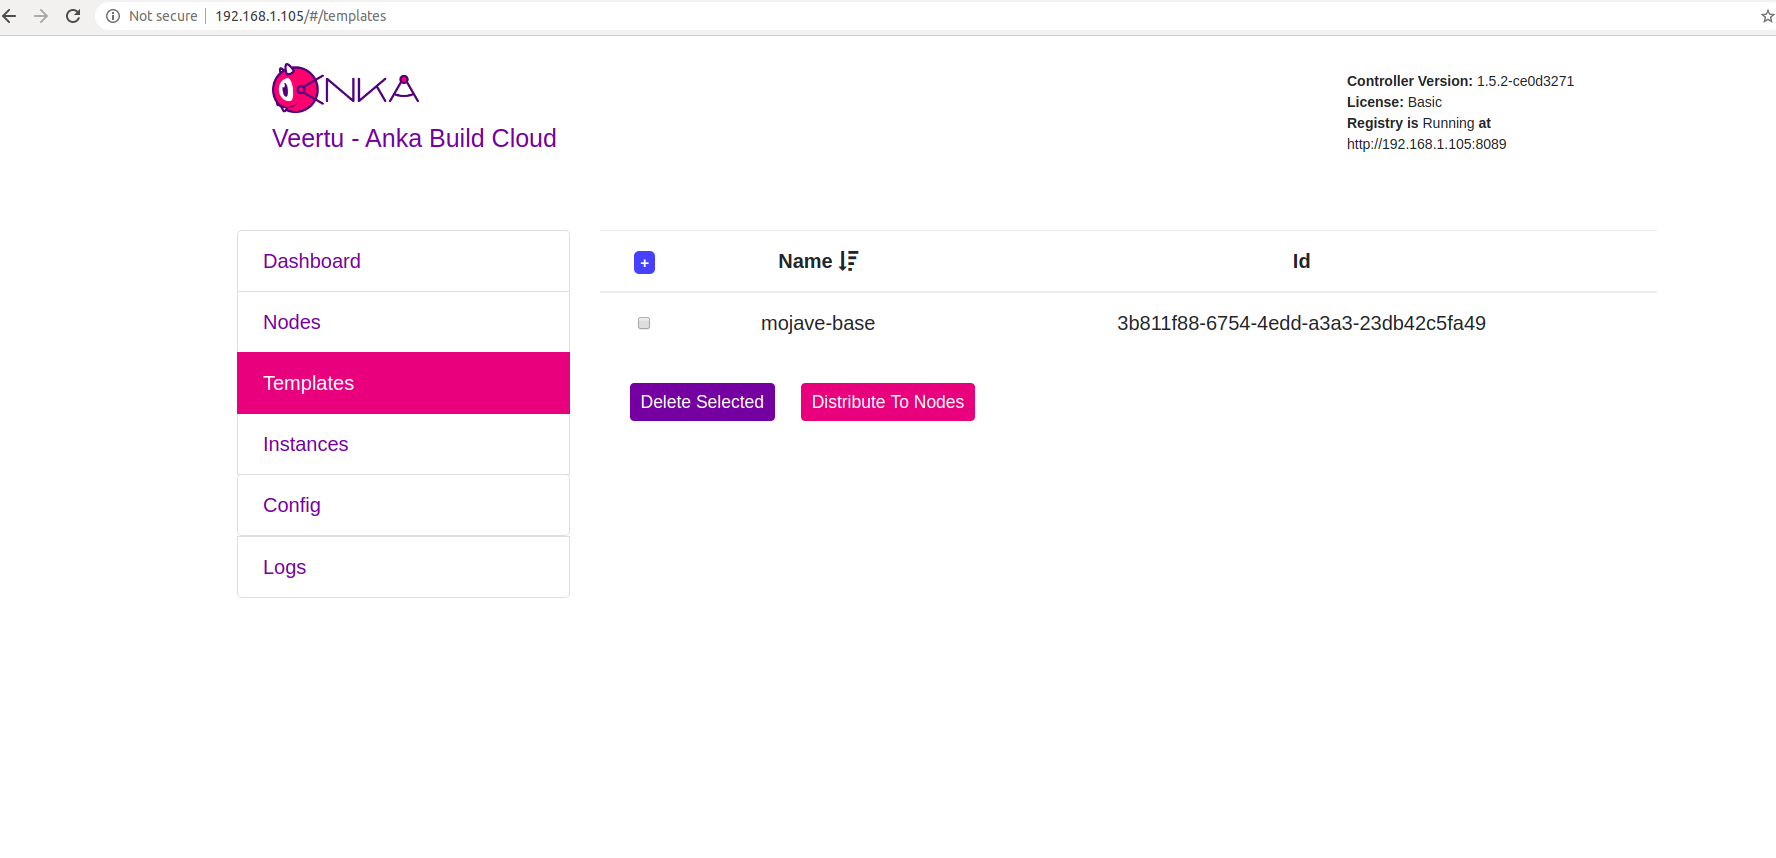
After the push completes, you should see your new Template in the “Templates” section of the controller UI.
Join to the Controller & Registry
sudo ankacluster join http://<ip>
Password:
Testing connection to controller...: Ok
Testing connection to the registry...: Ok
Ok
Cluster join success
- Replace
<ip>with the IP of the machine hosting your controller: - If you changed the default port for the controller from 80, you'll need to use the new port at the end of the IP. Otherwise, leave it off.
The command may hang for a few moments and then display Cluster join success. Please report any errors you find to support@veertu.com.
Step 4: Start a VM instance using the Controller UI
Go to your Controller dashboard and click on the Instances tab:

Click on Create Instance(s), and the Create New Instances view displays:
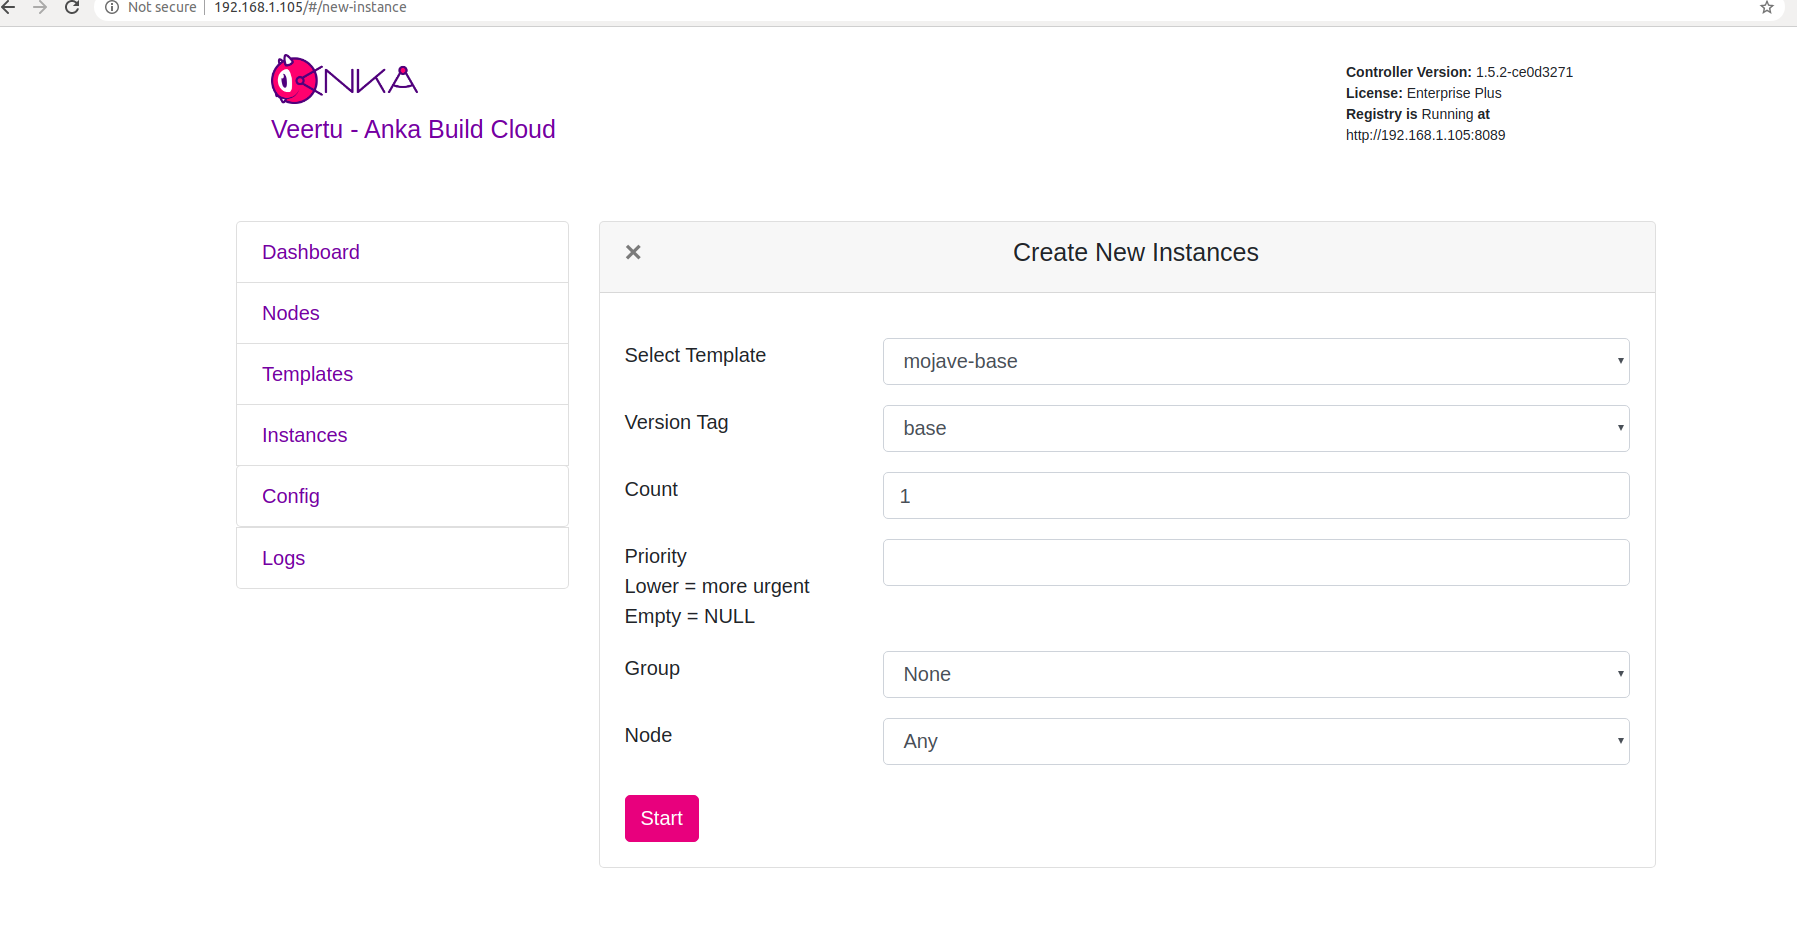
Select the VM Template and click Start. The Create New Instances view closes and returns you to the Instances view. You should now see the Instance in a Scheduling or Pulling State:
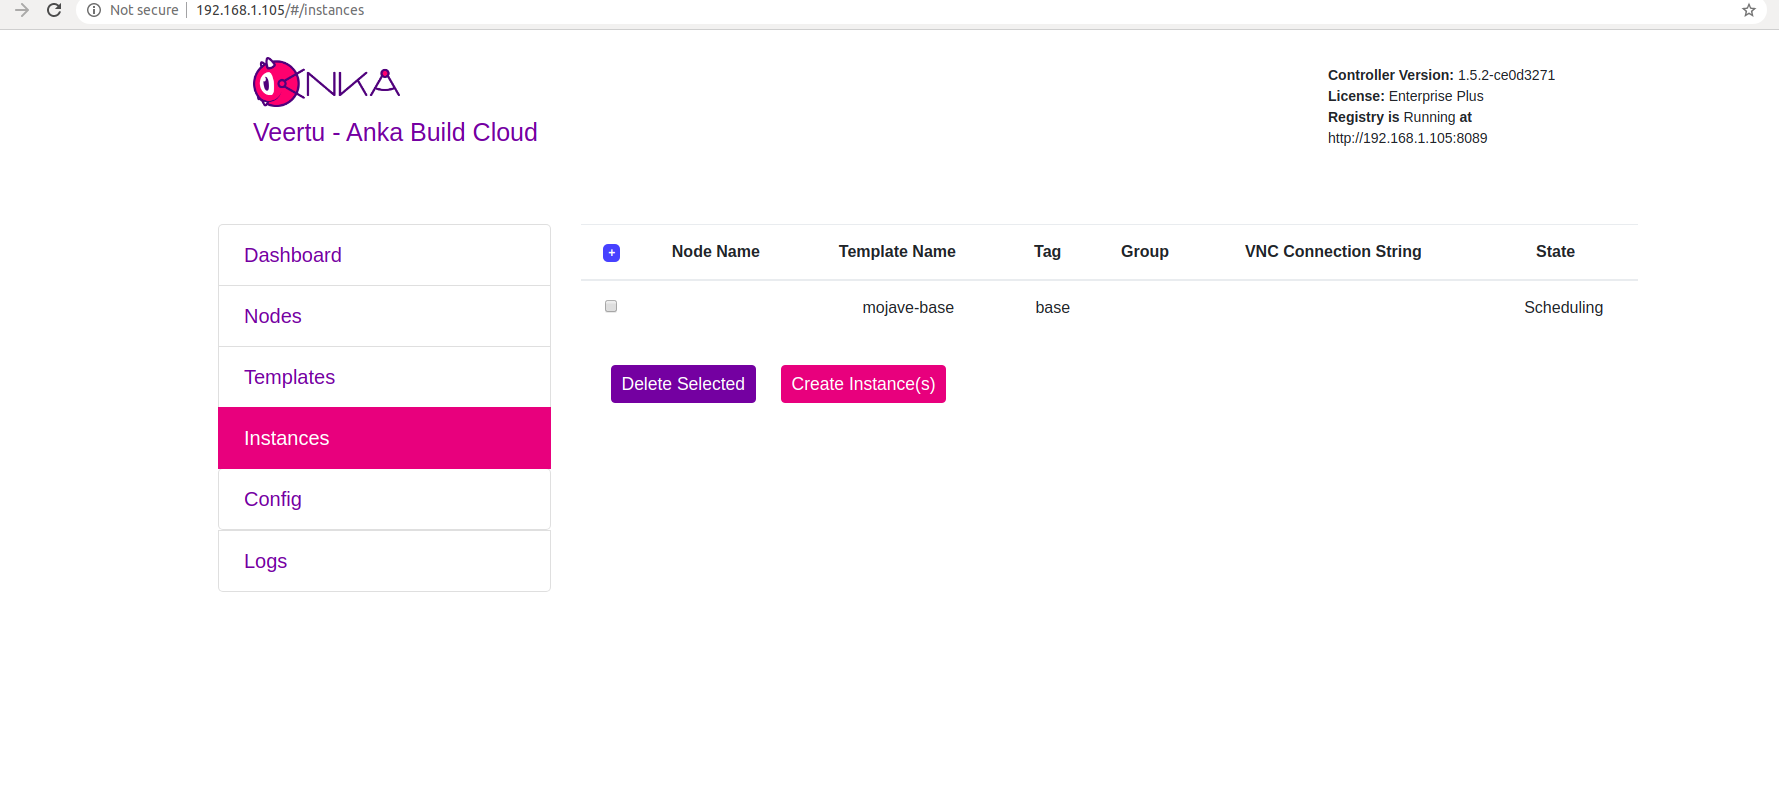
After the Scheduling and Pulling finishes, the VM starts on one of the Nodes and shows a Started State in the Controller UI:

You can now confirm the Instance is running from inside the Node:
- JSON output is available for scripting/automation using
anka --machine-readable
sudo anka --machine-readable list | jq
{
  "status": "OK",
  "body": [
    {
      "status": "suspended",
      "name": "catalina",
      "stop_date": "2020-04-01T21:30:59.798697Z",
      "creation_date": "2020-04-01T00:00:13.656296Z",
      "version": "base",
      "uuid": "10c720eb-dcce-46f7-baa3-28bacef0ec0f"
    },
    {
      "status": "running",
      "name": "mgmtManaged-catalina-1585776660490226000",
      "stop_date": "2020-04-01T21:36:11.742662Z",
      "creation_date": "2020-04-01T21:31:01.055250Z",
      "version": "",
      "uuid": "dcbeb319-421a-4d30-8466-194eb7fa5f75"
    }
  ],
  "message": ""
}
What next?
- Browse the Anka CLI Command Reference.
- Connect the cloud to your CI software.
- Find out how to use the Controller REST API.
- Learn how to work with USB devices
Feedback
Was this page helpful?
Glad to hear it! Please tell us how we can improve.
Sorry to hear that. Please tell us how we can improve.